The first thing homeowners get wrong about floor leveling compound is thinking it fixes every uneven floor. It does not. Floor leveling compound is a useful tool, not a magic bucket of pancake batter you pour over a bad subfloor and forget. Used on the right surface, it can save an expensive tear-out. Used on the wrong one, it cracks, debonds, or creates a new height problem at every doorway.
I have used plenty of it over the years, mostly beneath tile, luxury vinyl plank, and engineered flooring. The material itself is not complicated. The prep is where the job lives or dies. A room that looks reasonably flat can still have a dip that telegraphs through vinyl or leaves tile rocking underfoot. Before buying bags, find out what caused the unevenness and whether the structure is moving.
What Floor Leveling Compound Actually Does
Floor leveling compound is a cement-based or polymer-modified material designed to smooth low areas in a subfloor. Most products are self-leveling, meaning they flow across a prepared surface and settle into shallow depressions. That does not mean they find level by themselves in every situation. They still need the correct primer, enough water, a controlled room temperature, and a crew that can mix and place the material quickly.
The compound is intended to correct surface variation, not repair a failing floor system. A concrete slab with a small dip may be a good candidate. A wood subfloor that flexes when someone walks across it is not cured by covering it with cement. If the joists are moving, the finished floor will eventually show that movement too.
For tile, the goal is a flat surface so large-format pieces do not rock or leave ugly lippage. For LVP, the goal is eliminating humps and dips that can separate joints or make the floor feel soft. Hardwood and engineered planks usually need a different correction strategy because excess moisture and a heavy cement layer can create trouble.

How to Tell Whether Your Floor Needs It
Start with a long straightedge, not your eyeballs. Lay a six-foot level or straight board across the room in several directions. Mark gaps underneath it with pencil. A small isolated depression is a different problem from a broad slope running across the entire room.
A gradual slope may be perfectly acceptable, especially in an older basement, as long as the surface is flat enough for the flooring being installed. A sharp ridge or dip over a few feet deserves attention. Flooring manufacturers commonly publish flatness requirements, and those requirements are more useful than a generic promise on a bag of compound.
Check for moisture before covering concrete. A slab can look dry while vapor is still moving through it. Use the flooring manufacturer's approved moisture test and follow its limits. In a basement, also look for plumbing leaks, foundation seepage, and condensation. Floor leveling compound will not stop water. It can hide the evidence until the new floor fails.
On plywood, inspect for loose panels, squeaks, damaged edges, and inadequate fastening. Screws can solve movement caused by loose sheathing, but they will not correct undersized joists or serious deflection. If the floor bounces, fix the structure before smoothing the surface.
Choosing the Right Product and Estimating Cost
Most floor leveling compound is sold in bags that cover a stated area at a specific thickness. That coverage changes quickly. One 50-pound bag might cover roughly 45 to 50 square feet at a skim coat, but considerably less when filling a half-inch depression. Read the coverage chart at the thickness you actually need, then buy extra. Running short while the first batch is setting is a miserable way to learn arithmetic.
Material prices commonly land around $30 to $60 per bag for mainstream products from brands such as Henry, Custom Building Products, MAPEI, and Ardex. Primer, mixing barrels, gauge rakes, spike shoes, and edge dams add to the bill. A small DIY repair might cost $150 to $400 in materials. A professional pour over 500 square feet can easily reach $1,500 to $3,500 after prep, labor, delivery, and disposal.
That price can still beat removing tile, hauling out underlayment, rebuilding a damaged section, and installing everything again. On one kitchen job, proper preparation and a controlled pour saved the homeowner from replacing several hundred square feet of otherwise sound concrete-backed tile. The material was not cheap, but the alternative was several thousand dollars worse.

The Installation Mistakes That Cause Most Failures
The most common mistake is skipping primer. Concrete dust and porous wood can pull moisture from the mix before it bonds properly. The second is guessing the water measurement. Too much water makes the product easier to spread but weakens the cured layer and encourages shrinkage. Too little water leaves lumps and shortens working time.
The room must be sealed. Gaps around walls, pipes, doorways, and floor vents let liquid compound escape into places it was never meant to go. I have seen a basement pour disappear into an open wall cavity and a homeowner discover a very expensive gray stalactite downstairs. Seal the perimeter with the product maker's recommended foam, caulk, or dam material.
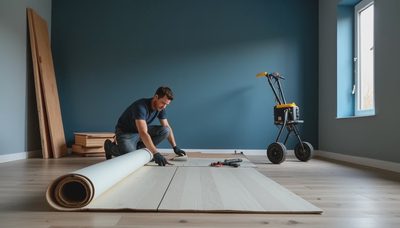
Mix with the proper paddle and a strong drill, and keep batches consistent. One bucket mixed thin and the next mixed stiff can leave visible transitions. Pour in a planned sequence, spread with a gauge rake, and use a smoother or spiked roller only as directed. Do not walk through wet material in ordinary shoes; it leaves ridges and contaminates the surface.
Drying time is not the same as curing time. A surface may feel firm while still holding moisture that could harm wood flooring or adhesive. Follow the product's recoat and flooring-installation window instead of trusting a fingertip test.
When You Should Tear Out Instead
Skip floor leveling compound when the subfloor is structurally unsound, actively wet, badly contaminated, or moving under normal foot traffic. It is also the wrong answer when the entire room has a major slope caused by settlement. You may be able to flatten the surface, but you cannot pretend the underlying structure is level and stable.
Tear-out is usually smarter when old flooring is loose across most of the room, when plywood has widespread water damage, or when multiple layers have created an unsafe height at stairs and exterior doors. Removing everything may reveal a repair that costs less than stacking new materials on top of old mistakes.
There is also a practical height limit. Adding three-quarters of an inch near a bathroom threshold can interfere with the door, toilet flange, dishwasher, or transition strip. Before pouring, measure finished heights at every opening. A technically flat floor that traps your dishwasher in place is not a successful renovation.
A Sensible Plan Before You Buy Bags
First, remove enough flooring to inspect the actual subfloor. Second, map high and low spots with a straightedge. Third, measure the deepest areas and calculate material using the manufacturer's chart. Fourth, test concrete moisture or inspect wood for movement and damage. Fifth, confirm that the finished height works at cabinets, stairs, doors, and transitions.
For a small patch under a floating floor, a feather-finish patching compound may be more appropriate than a full pour. For a broad, shallow correction over sound concrete, a self-leveling product can be efficient. For a flexing wood floor, repair the framing or subfloor first. If the surface needs more than a modest correction, have an experienced flooring installer check it before you commit to a truckload of bags.
I keep a photo of one failed pour in my Hall of Shame. The installer chased a structural dip with compound, ignored moisture, and laid flooring before the slab was ready. Six months later, the finish failed and the entire room had to be opened again. That was not a product failure. It was a diagnosis failure.
Floors take a beating every day. Don't let them beat your budget too.
TL;DR: Floor leveling compound is excellent for correcting surface dips on a sound, dry subfloor, but it cannot repair movement, water, or structural problems. Find the cause first, then decide whether leveling is cheaper than tearing out the floor.

Travellers Write
No letters yet — be the first traveller to write.