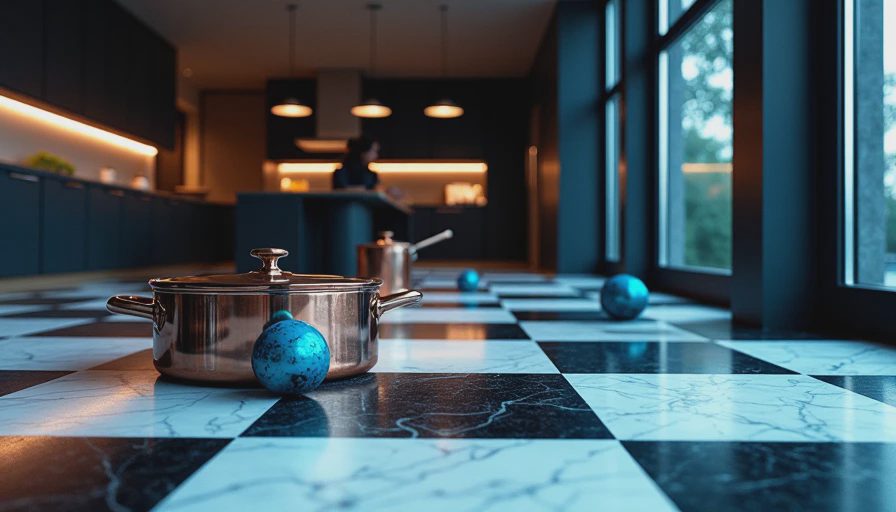
People see checkerboard kitchen floor tile in a magazine shoot and imagine that crisp black-and-white diner floor in their own kitchen. Then they get three estimates and wonder if the look is worth the hassle. After 18 years of installing tile in kitchens across Missouri and Illinois, I can tell you the real answer. It's not about whether checkerboard is fashionable. It's about layout, material, grout, and how much you trust your subfloor. Here's what I've learned on my knees.
Why Checkerboard Floors Wreck More Kitchens Than You Think
The first mistake homeowners make is thinking checkerboard means two colors of square tile, same size, alternate them, done. In theory, yes. In practice, that gives you a floor that looks like a cheap game board. The visual impact depends on scale, color contrast, and orientation. A black-and-white checker in 12-inch tile can make a small galley kitchen feel claustrophobic, while a 2-inch checker in an open floor plan looks busy. I've torn up floors installed correctly but specified wrong.
You also have to account for layout direction. If the checkerboard starts dead center but your cabinets are off-square, you get slivers of tile along the walls that scream amateur. That's why I always dry-lay the first rows before spreading mortar. It takes an extra hour and saves you from staring at a crooked pattern for a decade.

Picking the Right Tile
Not all tile is created equal. For a kitchen, I steer homeowners toward porcelain, not ceramic. Porcelain has lower water absorption, which matters when a pot of spaghetti sauce hits the grout. Daltile, MSI, and Florida Tile make matte-finish porcelain in true black and white that won't show every footprint. Expect to pay $2.50 to $5 per square foot at a flooring distributor. Big-box stores often charge less, but I've seen their tile vary in thickness. Checkerboard demands consistent size. If one tile is 11.75 inches and the next is 11.9, your pattern will drift.
Natural stone like black-and-white marble looks stunning in checkerboard kitchen floor tile. It also costs $8 to $15 a square foot and needs annual sealing. Unless you're ready for that maintenance, stick with porcelain. I put marble in my own kitchen once, learned that lesson, and swapped it out three years later.
The Layout Trap Nobody Warns You About
The biggest issue is the starting point. Most installers snap chalk lines through the center and lay from there. That works for uniform fields, but checkerboard is a grid that highlights every deviation. If your kitchen isn't perfectly rectangular, and most aren't, decide which walls get full tiles. I shift the grid so the cabinet toe-kick side gets a full black-and-white pair and the visible edges get balanced cuts. It's the difference between an intentional floor and one that looks like the installer quit halfway.
Also, avoid using the same grout color for both tiles. White grout against white tile disappears, but black tile makes it a blinding grid. I recommend a soft gray grout that works with both colors and hides crumbs.
What a Checkerboard Kitchen Floor Tile Actually Costs
Let's talk dollars. For a 200-square-foot kitchen, materials run $500 to $1,000 for porcelain and another $150 to $300 for thin-set, backer board, and grout. Labor in the Midwest runs $4 to $8 per square foot for a standard install, but a checkerboard pattern should cost more because every other tile is a different color. A good installer quotes $6 to $10 a square foot. If someone quotes the same as a straight lay, they're planning to rush.
Total installed, you're looking at $2,200 to $3,500 for a modest kitchen. That's less than hardwood but more than sheet vinyl. Cheap labor on a checkerboard kitchen floor tile always comes back to bite you. I've seen homeowners save $400 on labor and then pay $1,000 to have the floor ripped out because the pattern looked like it was laid blindfolded.
Grout, Cleaning, and the Reality After Year One
A checkerboard floor shows dirt differently. White tiles show dark crumbs; black tiles show dust. Kids or a dog mean more mopping. Use a grout release and seal the grout every 12 to 18 months. Skip white grout lines between black tiles. They look sharp on day one and dingy by week six. A medium gray grout hides the transition and keeps the checkerboard effect intact.
I tell clients to buy a good microfiber mop and a neutral pH tile cleaner. Avoid bleach. Bleach strips color out of darker grout and makes black tiles look washed out. This isn't a high-maintenance floor, but it's not no-maintenance either.
Should You DIY or Hire a Pro?
If you've set tile before, a checkerboard floor is a weekend project for a small kitchen. If you haven't, this isn't the place to learn. The pattern punishes every mistake. I've taught apprentices who could lay a straight floor beautifully, but ask them to alternate tiles without a layout plan and the result is a mess. Use a tile leveling system, like Raimondi or Spin Doctor. Budget $100 to $150 for a leveling kit if you're doing it yourself.
If you hire a pro, get references from a kitchen remodel, not a bathroom floor. Ask how they handle the starting grid and what grout color they recommend. A confident installer will have an opinion.
The Bottom Line
Checkerboard kitchen floor tile has been around for a century because it works. It hides nothing, so it forces you to commit to quality materials and a careful layout. For a kitchen, go ahead and get that checkerboard. Just don't cheap out on the install. Floors take a beating every day. Don't let them beat your budget too.
TL;DR: Plan the grid before you buy the tile, spend the extra money on porcelain and a leveling system, and find an installer who treats a checkerboard as a custom job. Do that and you'll get the look you saved in your Pinterest folder.

Travellers Write
No letters yet — be the first traveller to write.